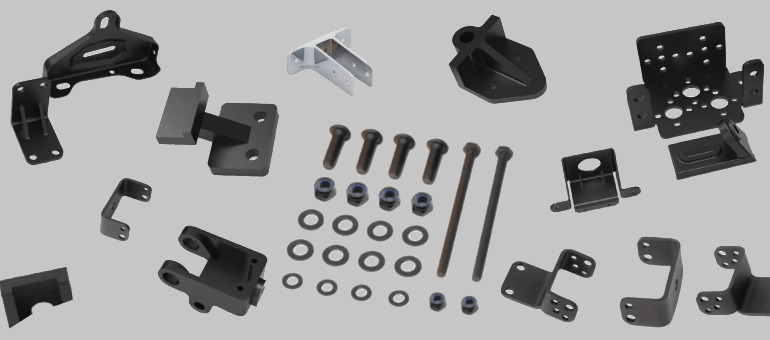
Sheet Arm Brackets are generic parts for a vast array of applications, from shelving and furniture right on through to automobiles and industry. Sheet arm brackets add strength, stability, and solidity to a construction. Whether you are a hobbyist metalworker, professional fabricator, or even a weekend warrior DIYer, in this article we are going to take you through the step-by-step guide to making world-class sheet arm brackets from the ground up.
Understanding Sheet Arm Brackets
Metal sheets like stainless steel, aluminium, and mild steel are employed in the production of sheet arm brackets. The brackets are applied in weight transfer and structural component strengthening. Applications of the brackets are:
- Shelving systems
- Machinery support
- Construction structures
- Motor and aerospace industries
Materials and Equipment Needed
The acquisition of the material and equipment needed is the requirement prior to fabrication:
Materials:
- Metal sheet (Aluminum, Stainless Steel, or Mild Steel)
- Scribing tools (Scriber, Marker)
- Cutting lubricant (such that cutting is smooth and not overheating)
- Protective coatings (Powder coating, Paint, or Galvanizing)
Tools:
- Metal cutting tools (Shears, Plasma cutter, Angle grinder, or Laser cutter)
- Measuring tools (Calipers, Rulers, Tape measure)
- Drill press or hand drill
- Vices and Clamps
- Welding equipment (if required for reinforcement)
- Press brake or bending machine
- Safety equipment (Welding mask if required, Gloves, Safety glasses, Ear protection)
Step-by-Step Procedure for Making Sheet Arm Brackets
Step 1: Designing the Bracket
The first process in producing a sheet arm bracket is to control the size and shape of the bracket based on the requirements of the application. Consider the following:
- Metal sheet thickness (typically between 1 mm and 5 mm based on loads to be carried)
- Mounting hole size and position
- Bending stability angles
- Weight to be carried by the bracket
- Create a computer-aided design model of the bracket through computer software like AutoCAD, SolidWorks, or Fusion 360 before cutting.
Step 2: Cutting and Marking Metal Sheet
Use a marker or scriber to mark the metal sheet after designing an attempt to have precise cutting.
Cutting Operations:
- Shearing: Ideal for straight-line cutting with minimal trimming.
- Plasma Cutting: Ideal for sharp radii and thick gauge sheets.
- Angle Grinder: Good for hobbyist level of DIY.
- Laser cutting: smooth finish and high accuracy but slow.
- Use a good clamp to hold the sheet in place during cutting so that it will not be moving about.
Step 3: Drilling the Fastener Holes
After cutting the bracket to size, the process of drilling the mounting holes is the second procedure where the screws or the bolts are to be driven.
Drilling Tips
- Use centre punches to dimple areas where holes must be drilled.
- Use cutting lubricant to cut down on friction and prevent overheating.
- Use the step drill bit to create clean, accurate holes.
Step 4: Metal Sheet Bending
The metal sheet should be bent at exact angles to achieve the desired form.
Bending Techniques:
- Vise Bending: Thin sheets; use a mallet to adjust.
- Press Brake: Offers accurate and repeatable bends, best suited for mass production.
- Roll Bending: Employed to bend the production of brackets.
- Use angle guides to generate accurate angles of bending because wrong angles lower the strength of the bracket.
Step 5: Welding and Reinforcement (If Required)
Welding in certain cases may be necessary to give strength through a property of strengthening
Welding Processes
- TIG Welding: Produces clean welds on stainless steel as well as aluminium.
- MIG Welding: Quicker and appropriate for thicker material.
- Spot Welding: Thin sheet only, no heat overload.
- Prevent metal warping with proper heat control.
Step 6: Surface Finishing
For strength as well as appearance, finish the bracket with a suitable finish.
Finishing Options:
- Deburring: Cut burrs by grinding or filing them.
- Powder Coating: Rust-free and has a good appearance. Galvanization: Outer exposure to avoid rust.
- Painting: Provides a personal touch as well as protection.
Step 7: Final Assembly and Testing
Quality inspections prior to bracket installation:
- Verify the size and position of the hole.
- Weight testing can be utilized to ensure proof of the stability of the structure.
- Fit properly in place for the intended assembly.
Prevention of mistakes
- Inaccurate Material Selection: The use of a material too weak for the load required leads to failure.
- Inaccurate Marking and Measurement: Measure twice, cut once.
- Wrong Bending Angles: Angle bends make the bracket useless.
- Missing Deburring: Scratchy edges hurt and compromise safety.
Applications of Sheet Arm Brackets Across Diverse Industries
- Motor Vehicle Industry
Metal sheet brackets are used in engine mounting, chassis support, and support frameworks.
- Building Industry
Commonly applied in construction frames, scaffolds, and frames.
- Furniture Industry
Shelf support, tabletops, and modular furniture are good applications.
- Aviation Industry
Refined aluminium brackets are used in airplane and equipment fixtures for building.
Conclusion
Sheet arm brackets is one of the basic metalwork processes that you have to undertake with care and detail and the right tools. With this tutorial, you can make solid and durable brackets that you can use in most scenarios. For household or company applications, having the ability to know how to undertake the process will allow you to have solid and working brackets depending on your requirements.
Also: Automotive Sheet Metal Fabrication: Different Techniques and Materials


