Hardwood floors are a stunning feature in any home, but over time, they can begin to lose their luster. Fortunately, refinishing hardwood floors is an affordable and rewarding DIY project. With the right tools and some elbow grease, you can restore the beauty of your floors just like the pros. In this guide, we’ll walk you through the best tools for DIY hardwood floor refinishing—tools commonly used by professionals that will help you achieve a perfect finish.
Why Refinish Hardwood Floors?
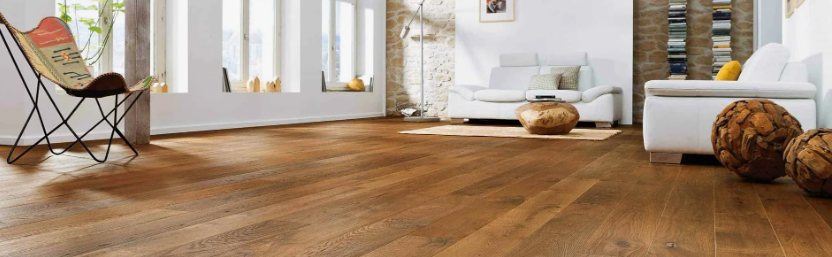
Refinishing hardwood floors enhances their appearance by removing signs of wear, restoring color, and sealing them to protect against future damage. Refinishing not only revives the look of your home but also extends the life of your floors. But to do this effectively, the right tools are essential.
Best Tools for DIY Hardwood Floor Refinishing: Essential Equipment
To achieve a professional-quality result, here are the best tools for DIY hardwood floor refinishing that you’ll need to have on hand:
1. Floor Sander
The first and most important tool when refinishing hardwood floors is a floor sander. A sander removes the existing finish and smooths the surface of the wood. Professionals typically use a large, heavy-duty drum sander for this purpose, but for DIYers, orbital sanders are more manageable and user-friendly.
Why it’s important: The sander helps to strip the old finish while leveling uneven areas. It ensures that your hardwood floors have a clean, smooth surface, essential for applying new coats of stain and polyurethane.
2. Edge Sander
While a large floor sander covers most of your floor, you’ll need an edge sander to handle the corners and edges that the drum sander can’t reach. This tool is compact and easier to maneuver, providing a smooth, even sanding along the perimeter of the room.
Why it’s important: Achieving a seamless transition between the main floor area and the edges is crucial for a professional-looking finish. An edge sander ensures that even these hard-to-reach places get the same level of care as the center of the floor.
3. Floor Buffer/Polisher
After the sanding process, it’s time to buff and polish your floors. A floor buffer is used to smooth out any remaining scratches and inconsistencies in the wood, giving your floor an ultra-smooth surface. Using a buffer with a fine-grit pad ensures an even finish, which is key before applying the final coat of varnish or polyurethane.
Why it’s important: The buffer helps create a perfectly smooth surface for the finish, ensuring the longevity of your refinishing job. It’s an easy way to add a professional touch to your DIY project.
4. Dust Extraction System
Sanding hardwood floors creates a significant amount of dust. For both health and cleanliness, investing in a dust extraction system is a must. Professional sanders usually come with dust bags, but using an industrial-grade dust collector will help minimize dust in the air and protect both you and your workspace.
Why it’s important: The dust from sanding can settle on surfaces, leading to an uneven finish. A dust extraction system helps eliminate the mess and create a clean environment for the finishing stages of the project.
5. Floor Finish Applicator
Once you’ve sanded and buffed the floor, it’s time to apply the new finish. Whether you’re using polyurethane, stain, or a combination of both, a high-quality floor finish applicator is key. This tool can be a lamb’s wool applicator or a microfiber mop designed to evenly spread the finish over the surface.
Why it’s important: Even application is the key to a flawless finish. An applicator tool ensures that the product is spread evenly across the floor, reducing the chances of streaks and unwanted textures.
6. Brush for Edges and Corners
You may need a brush to apply the finish to edges and tight corners where the larger applicator can’t reach. A fine bristle floor finish brush will allow you to carefully apply the finish to these areas, ensuring uniformity and beauty throughout the floor.
Why it’s important: Not only does a brush give precision for edgework, but it also helps achieve a clean look in hard-to-reach spaces like along baseboards or under cabinets.
Refinishing Your Floor: The Process
After gathering your tools, it’s important to follow the correct procedure to ensure your refinishing project is successful. Here’s a brief overview of the process:
- Prep the Floor – Start by cleaning the floors and removing any furniture from the room. You’ll also want to protect the surrounding areas with painter’s tape or plastic sheets.
- Sand the Floor – Use a floor sander to remove the existing finish. Start with coarse-grit sandpaper, gradually moving to a finer grit. Use an edge sander to tackle the corners and edges.
- Buff the Floor – Once sanding is complete, use a floor buffer with a fine pad to ensure the floor is smooth.
- Clean Up – Use a dust extraction system or a shop vacuum to remove any remaining dust from the floor’s surface.
- Apply Finish – Use your floor finish applicator for the main area, and a brush for the edges. Let each layer dry before applying another.
FAQs About Hardwood Floor Refinishing
What is the cost of DIY hardwood floor refinishing?
The total cost will depend on the tools you already own and the size of the area you’re refinishing. However, if you hire a professional, the cost can be significantly higher. Typically, DIY refinishing can cost anywhere from $300 to $500 for tools and materials, much less than the $2 to $3 per square foot it would cost to hire a professional.
Can I use regular sandpaper for hardwood refinishing?
While it’s possible to use regular sandpaper, it’s highly recommended to use floor-specific sanding discs or paper designed for refinishing. These provide better results and last longer, helping avoid deep gouges or scratches in your hardwood floors.
Conclusion: Tools for the Perfect DIY Floor Refinish
By choosing the best tools for DIY hardwood floor refinishing, you can achieve stunning results without needing professional help. Tools like sanders, floor buffers, and finish applicators allow you to replicate a professional job. If you feel uncertain or need expert guidance, professional all-in-one remodeling services can help you complete any project efficiently and successfully, giving you peace of mind.
With these tools at your disposal, refinishing your hardwood floors becomes a manageable and rewarding DIY project, bringing out the natural beauty and longevity of your home’s floors!